#
Accounts & Application Management
#
What is an account and what is it used for?
The account is a linux user which can be used simply to access the server. However, you probably want to deploy one or multiple applications under this user. This guide will explain how to deploy system users and all settings your application requires.
In the TurboStack App, you can create accounts in two ways: either by creating a brand-new account or by cloning an existing one.
For staging and production instances of an application, best practice is always to use an entirely different server, because it's by design unavoidable that resources allocated for staging, will be (silently) "taken away" from production. Even when this staging application is rarely used, it would still consume memory for e.g. databases, causing avoidable overhead.
#
Creating a new account
#
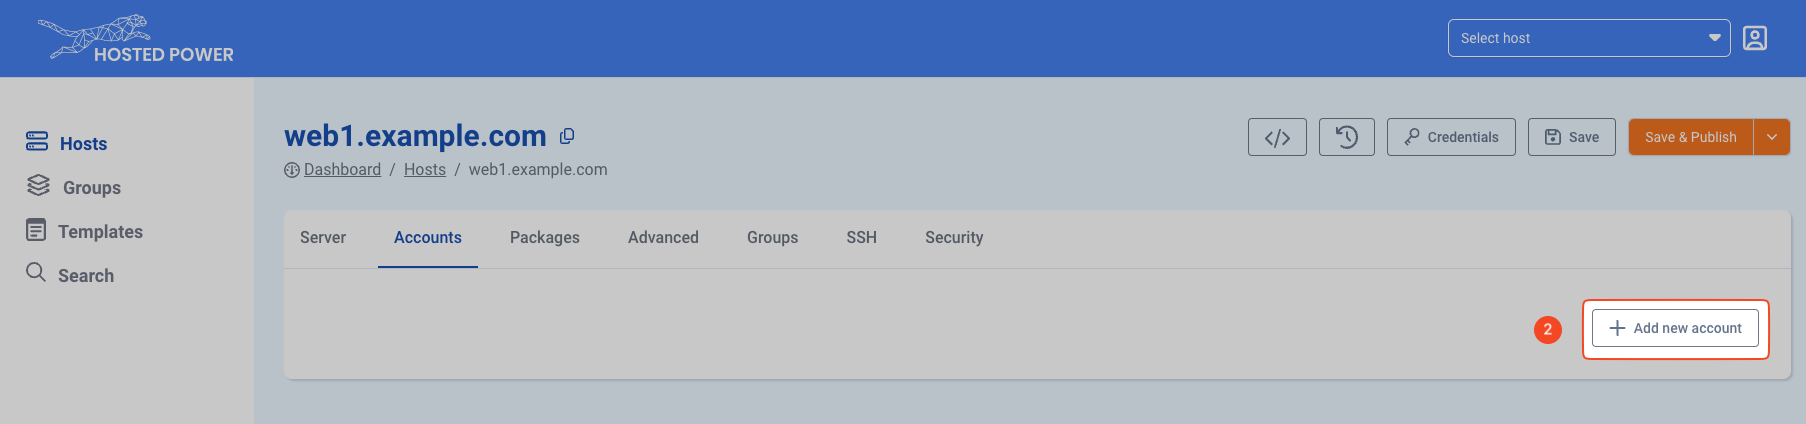
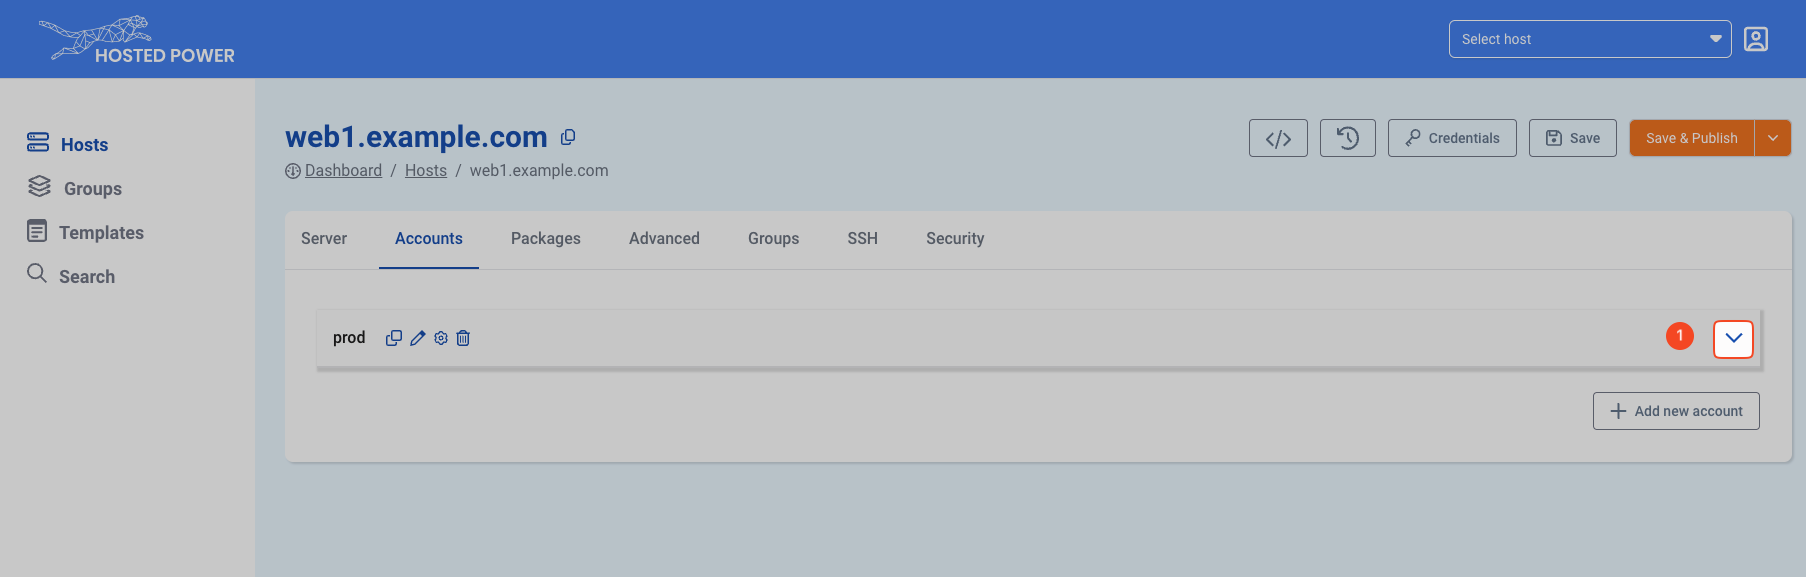
How to deploy a new account in the GUI
Creating a new user on the TurboStack App.
- Open the TurboStack App
- Open the server view
- Go to the
Accountspage
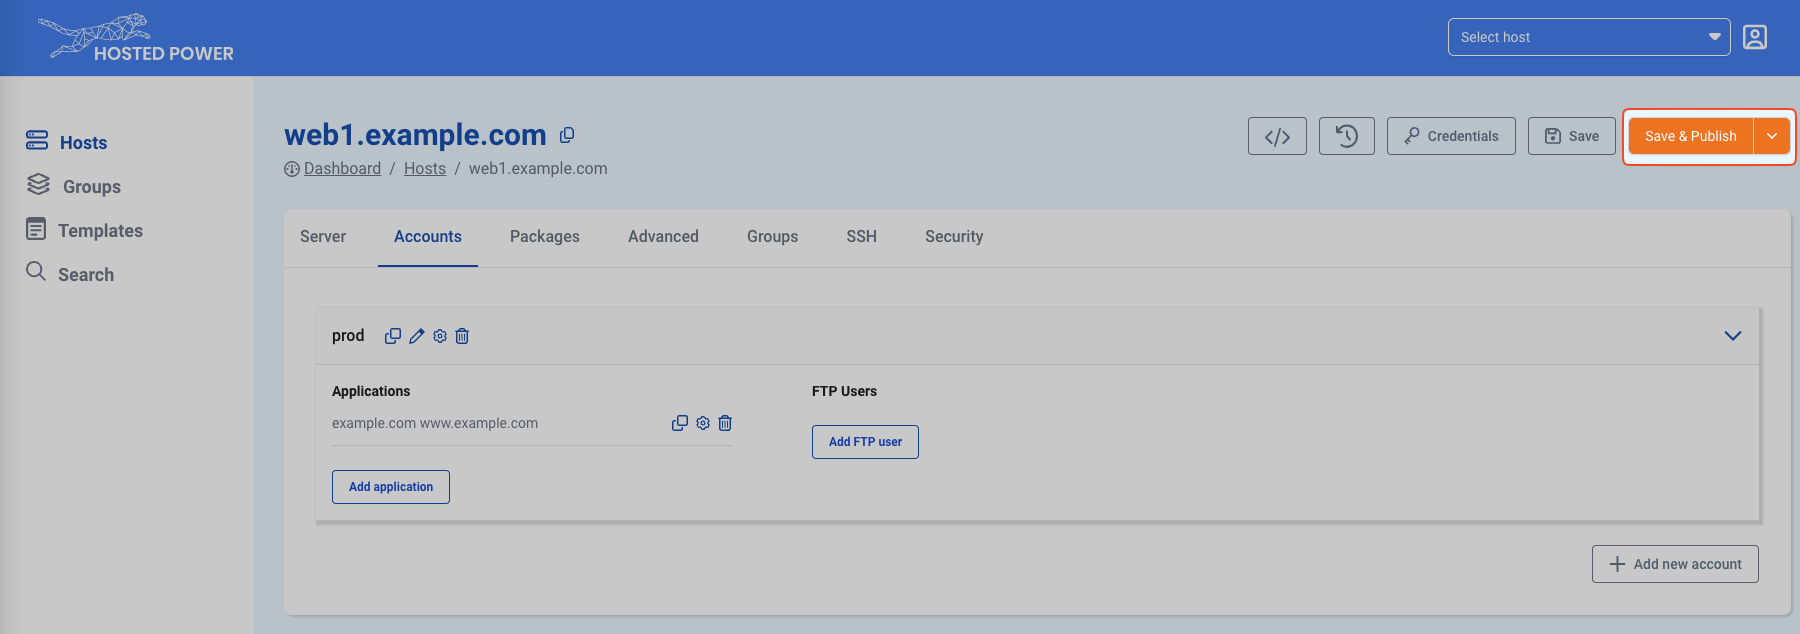
TurboStackNewUser - Add a new account (user)
TurboStackNewUser - Give the account a name and save
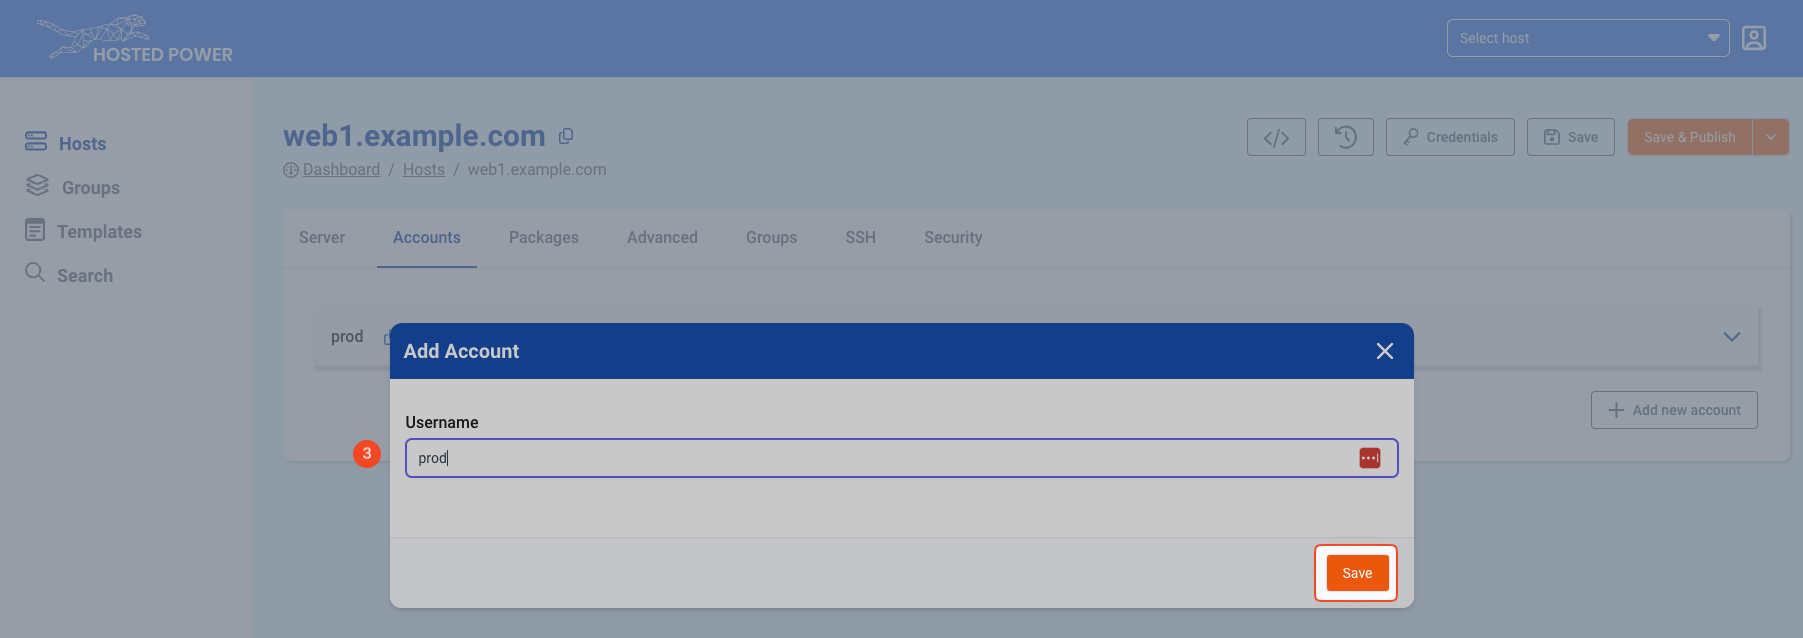
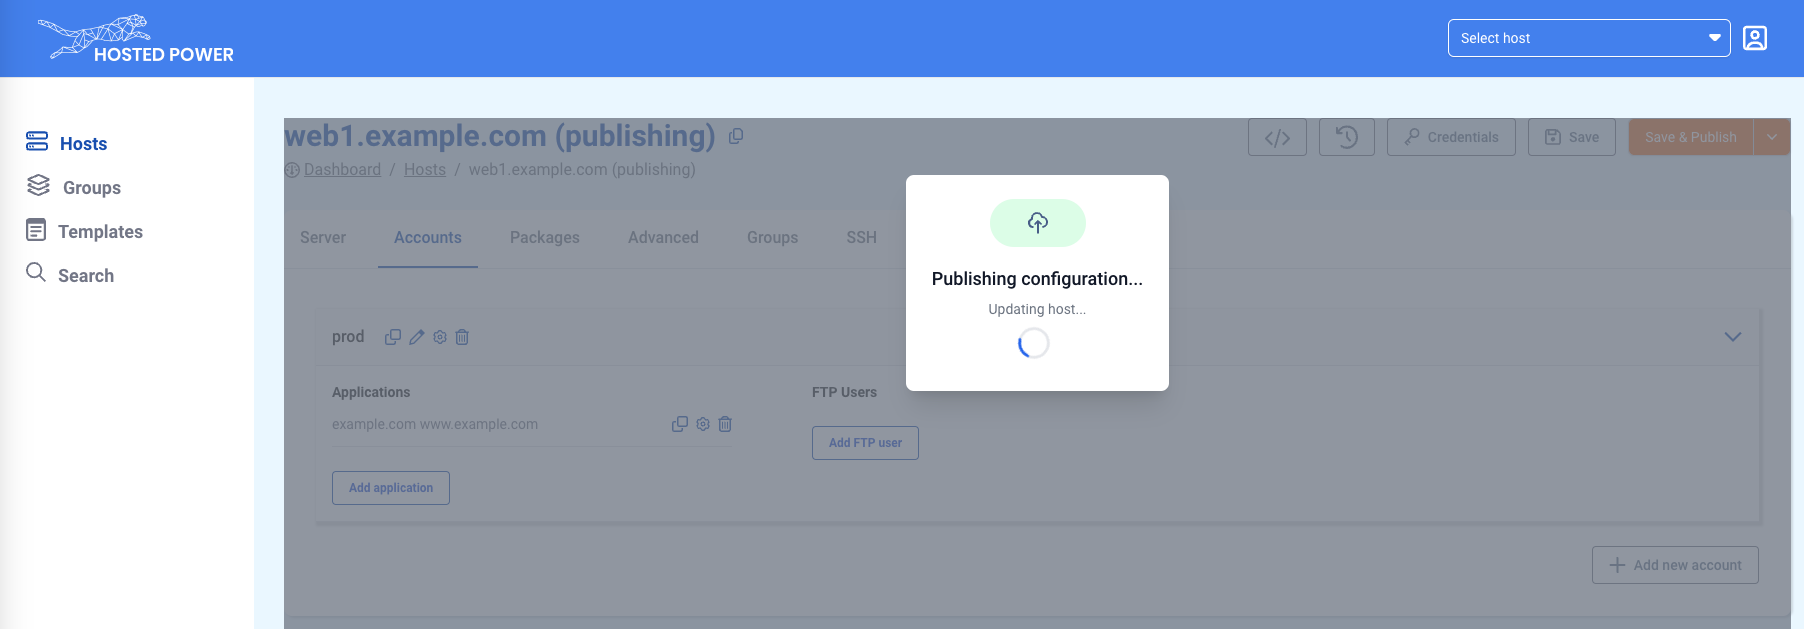
TurboStackNewUser Save and Publishwill deploy the change to the host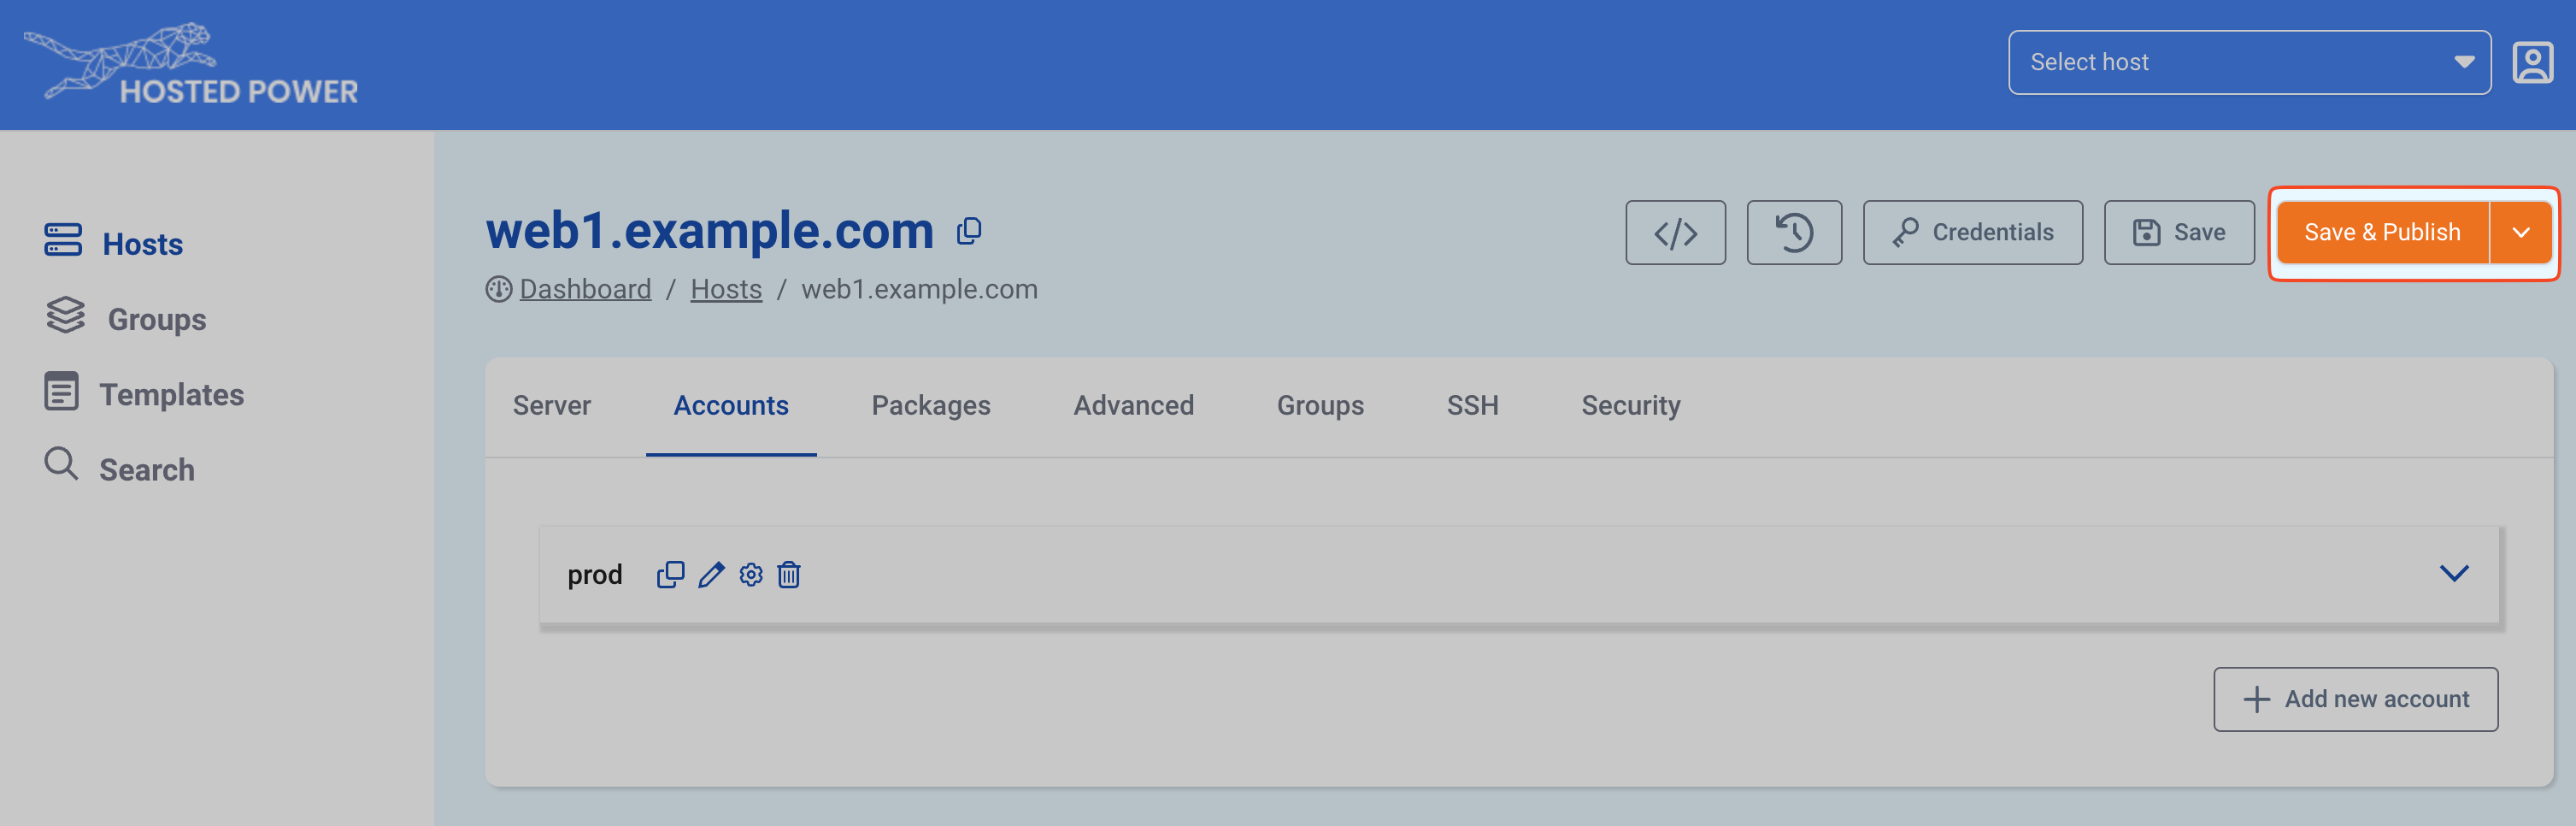
TurboStackNewUser
#
How to deploy a new account in the source YAML
Advanced
for more advanced users there also the YAML configuration. adding a new account can be done with
system_users:
  - username: prod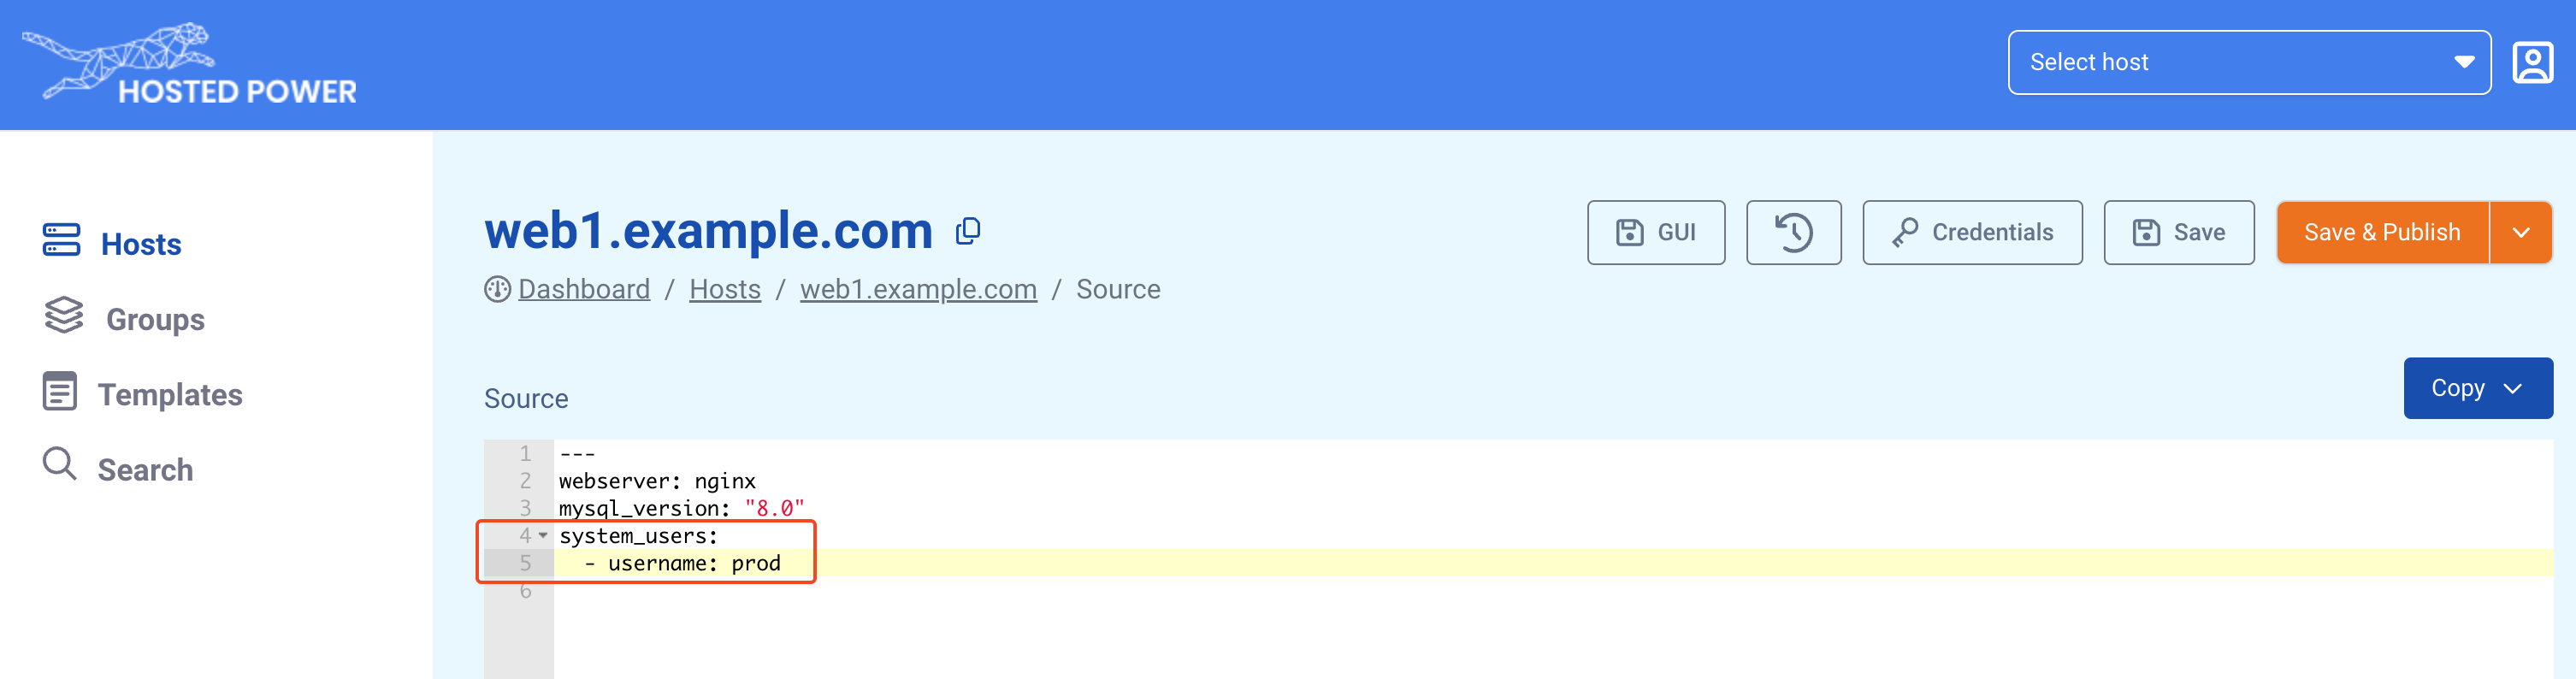
Now an account is created. Applications can be installed.
#
How to create a new application
- Open the TurboStack app
- Click the host view
- Select to host to update
#
Prerequisite
Creating a new user on the TurboStack App. An account must exist before an application can be configured. How to create a new account
#
Creating a new application in the GUI
Creating a new (default) application under the newly created prod user.
Scenario: creating a Magento2 application, listening on www.example.com and using varnish as caching
- Open the detail section for the user
TurboStackNewApp - Click to add a new application
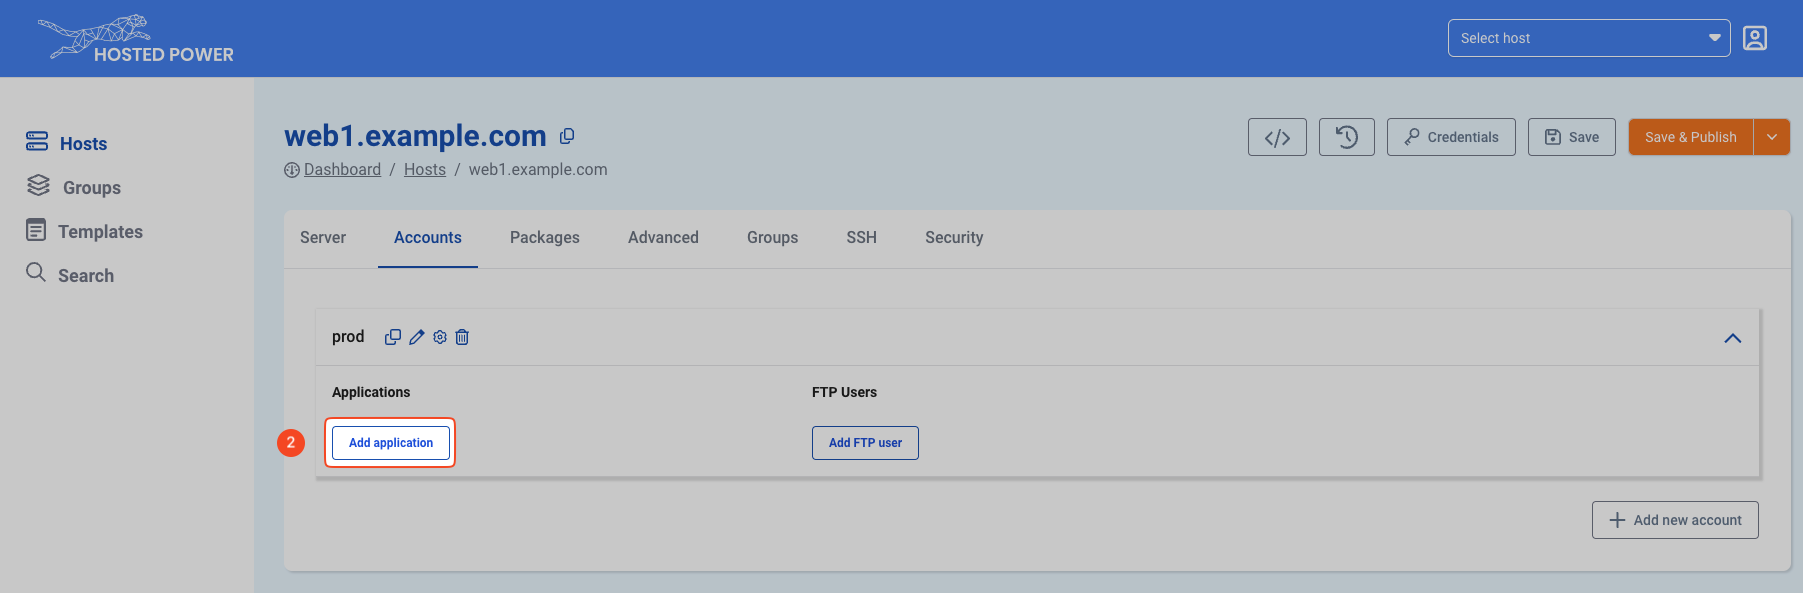
TurboStackNewApp - The first application for each user should always be
default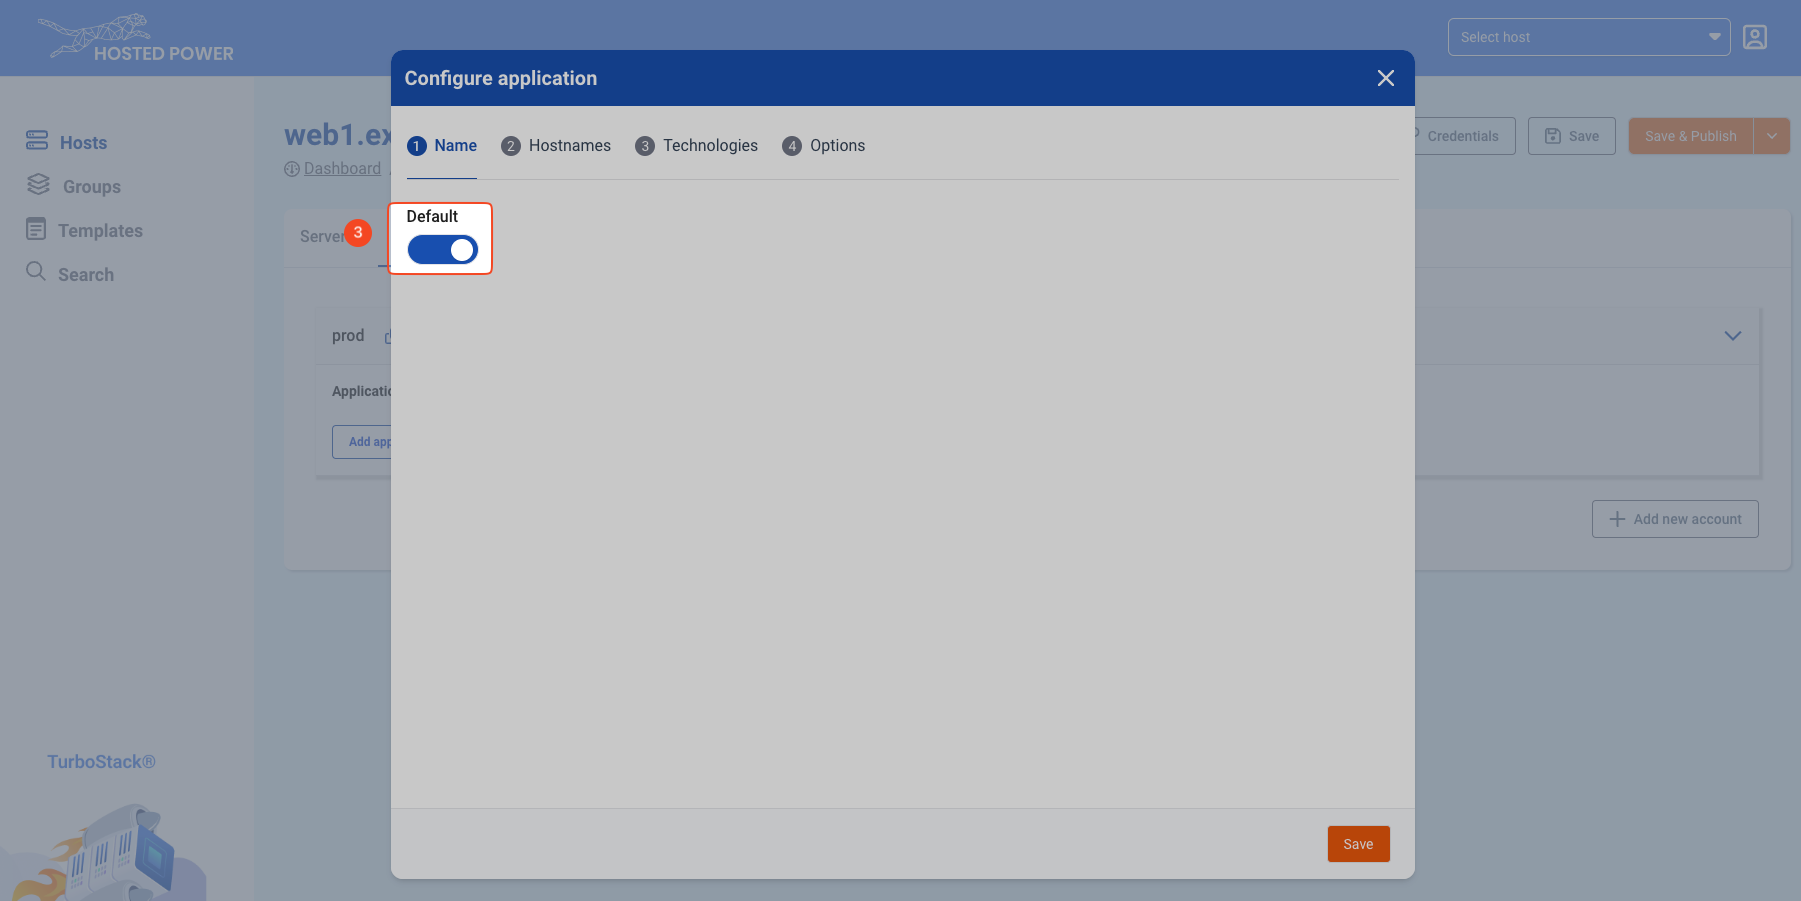
TurboStackNewApp - Go to
Hostnamesand 1 or more names the website should listen on - Choose a website SSL certificate, there are 3 options:
letsencrypt(default),self-signedandcustom(3rd party certificate) (*)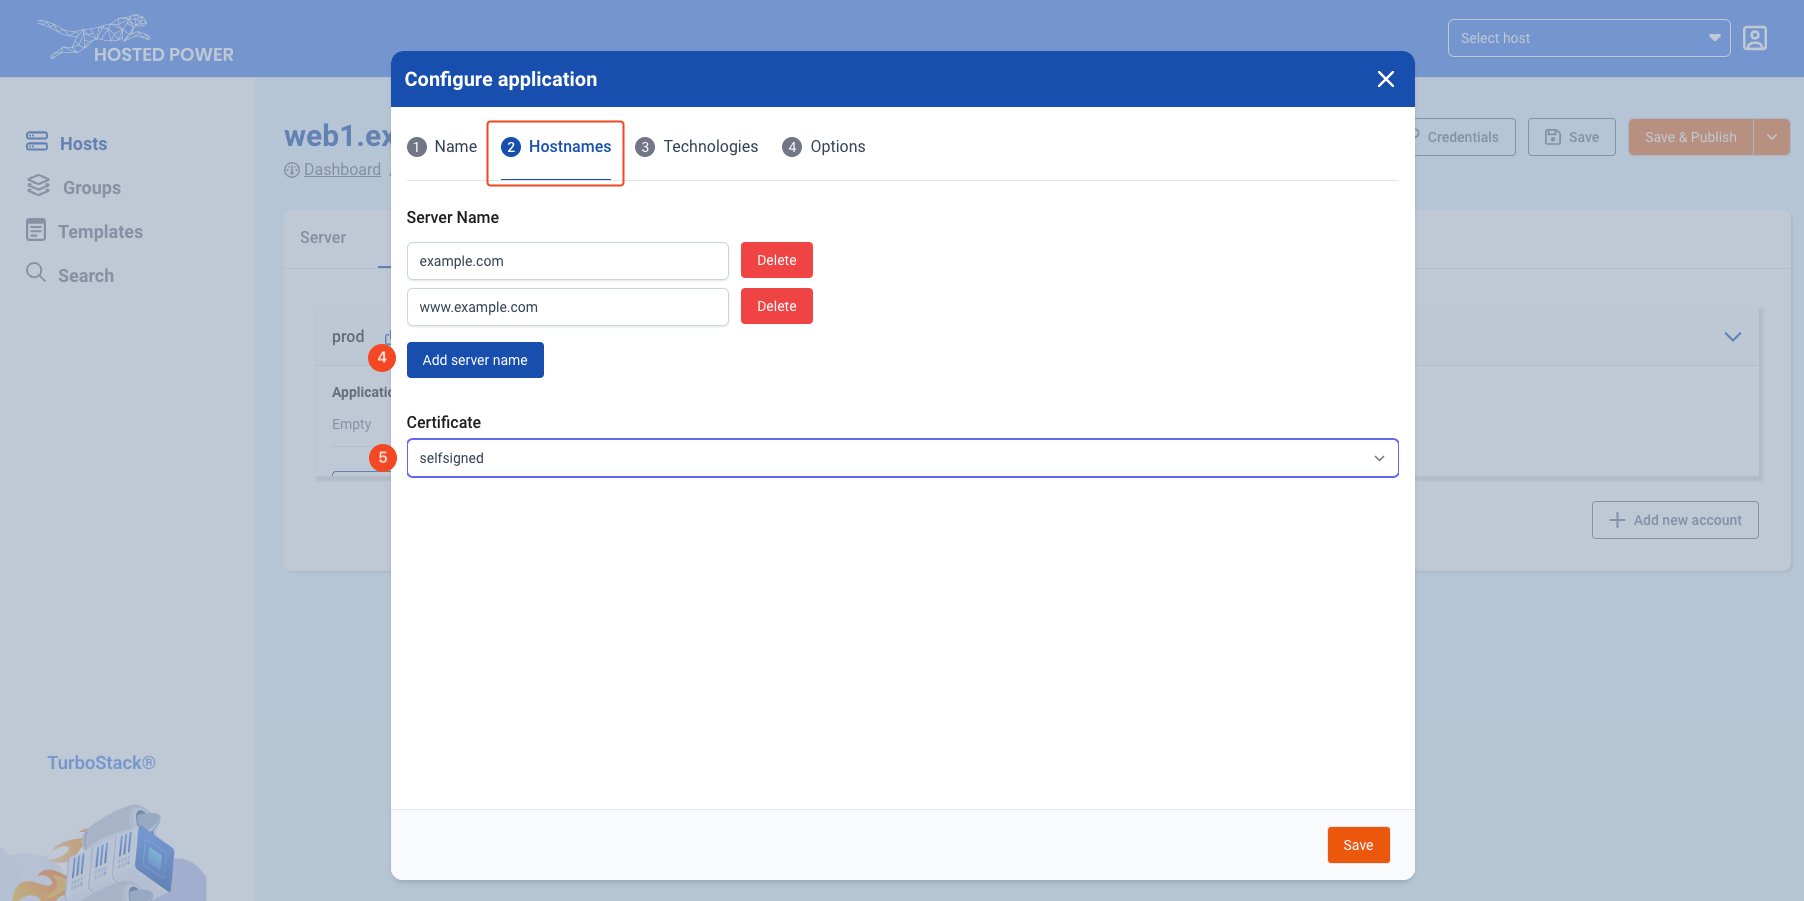
TurboStackNewApp - Go to
Technologiesand set the app type (**) that matches your application - Enable PHP or another technology that your application requires
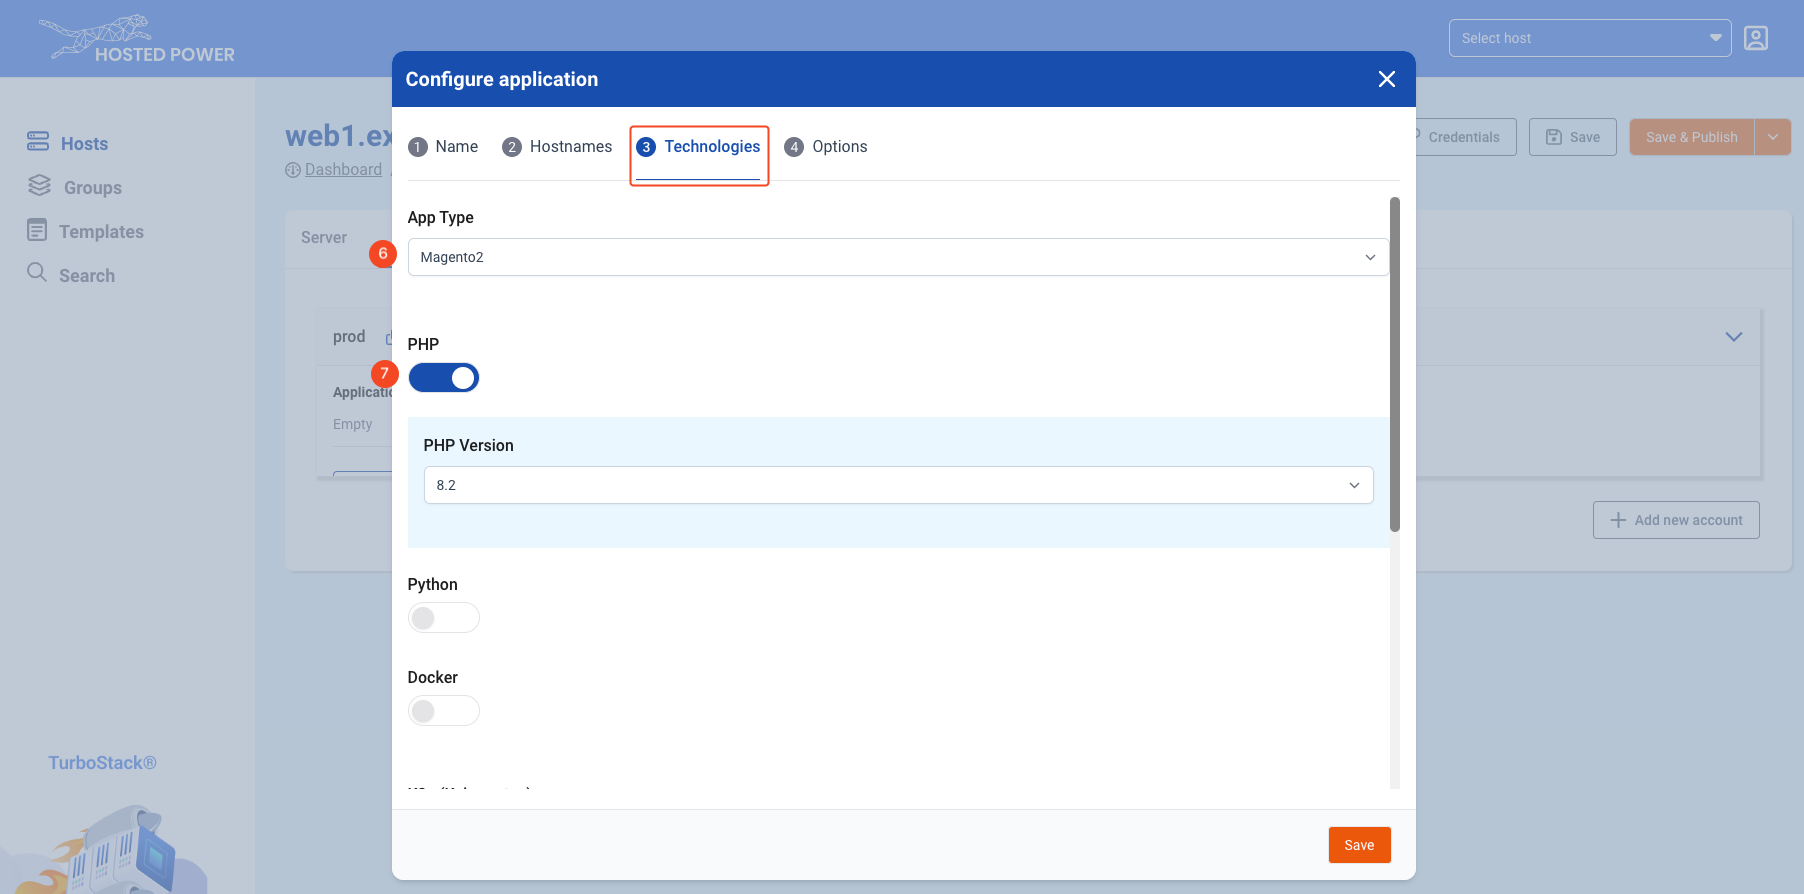
TurboStackNewApp - Scroll down to enable
varnish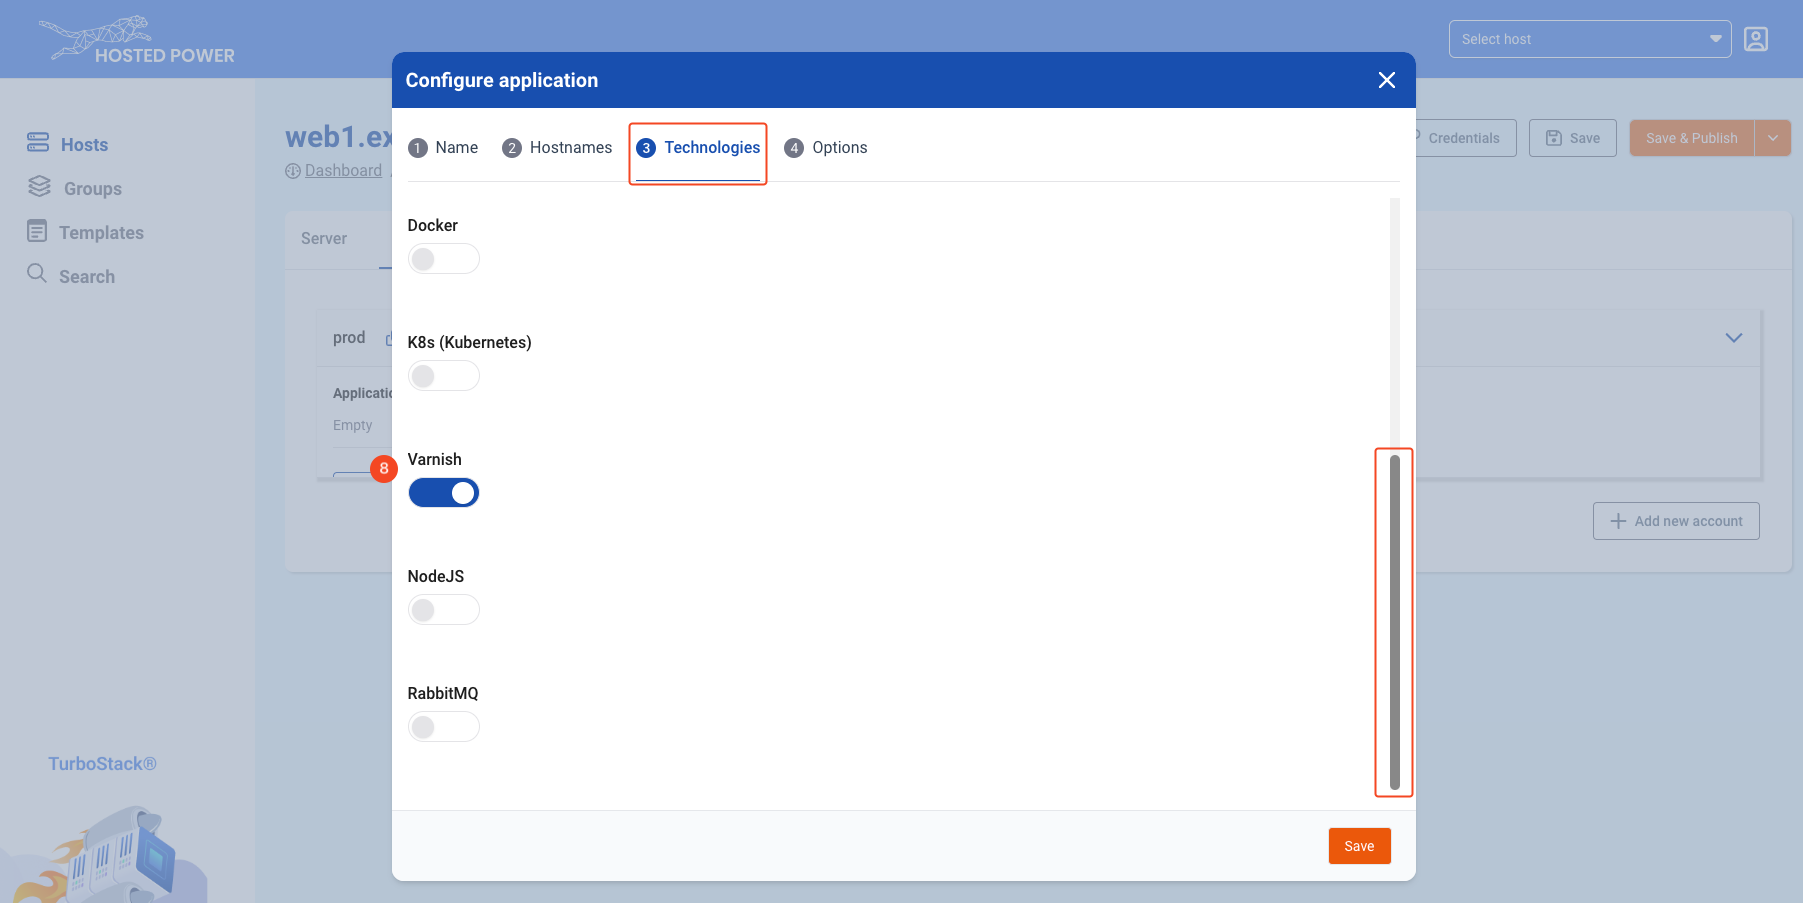
TurboStackNewApp - When going live, set a
monitoring urlso Hosted Power will monitor 24/7.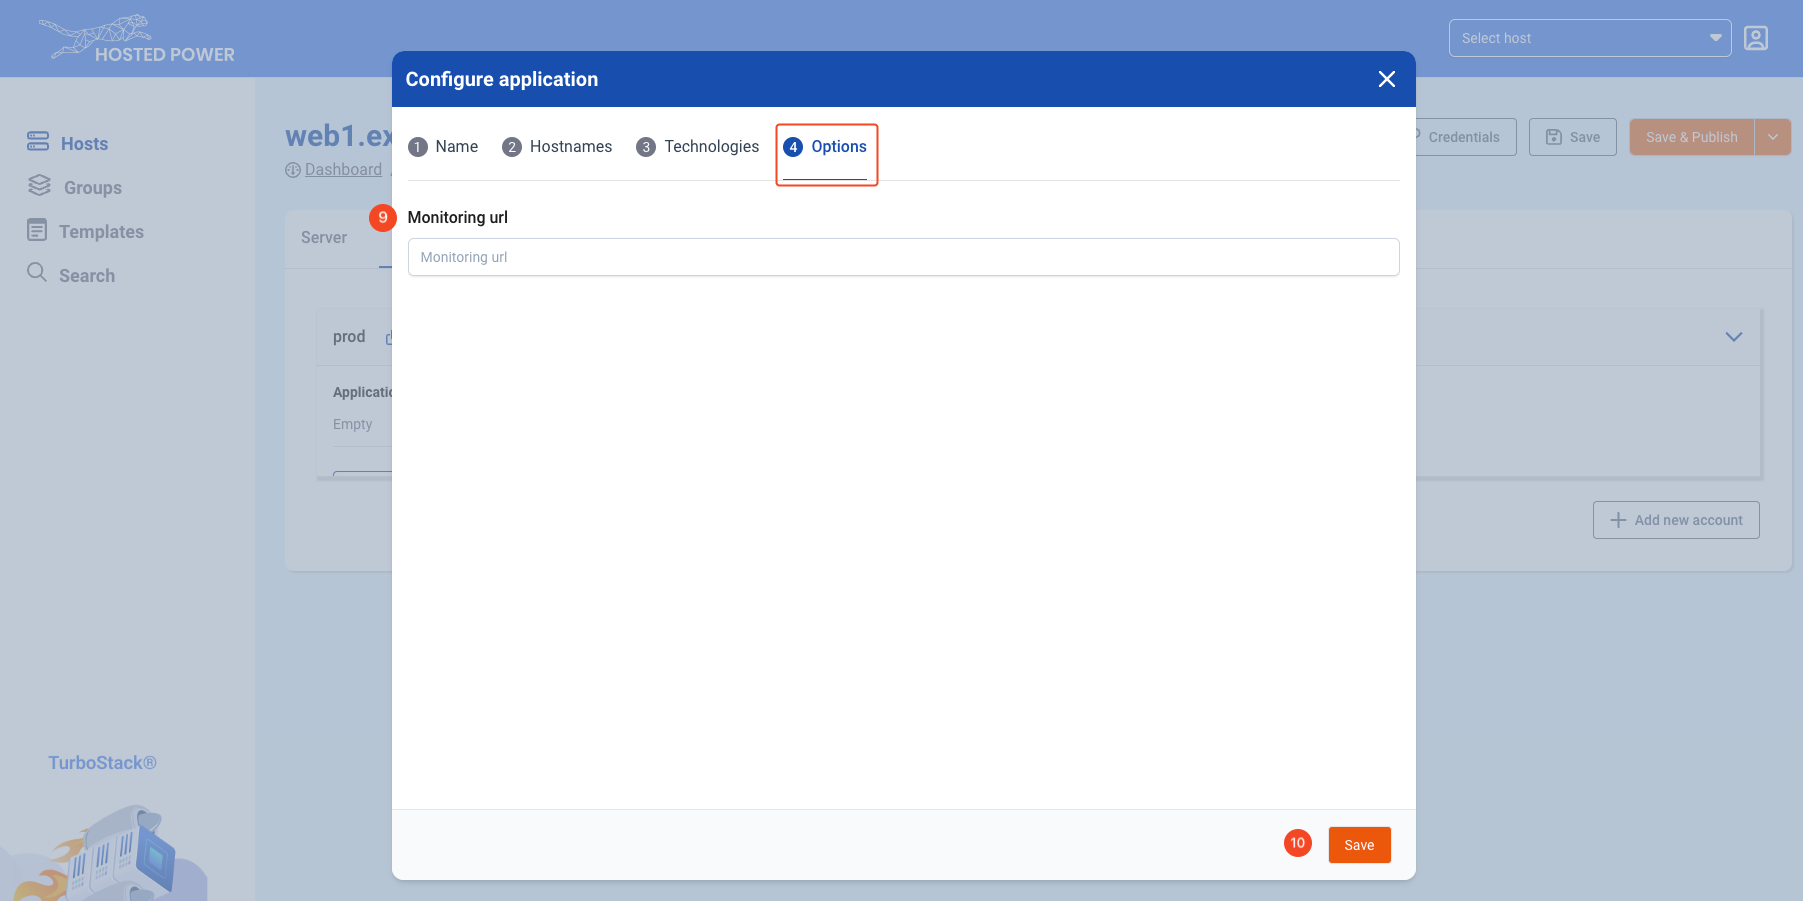
TurboStackNewApp - Click
Saveto save and exit the configuration wizard.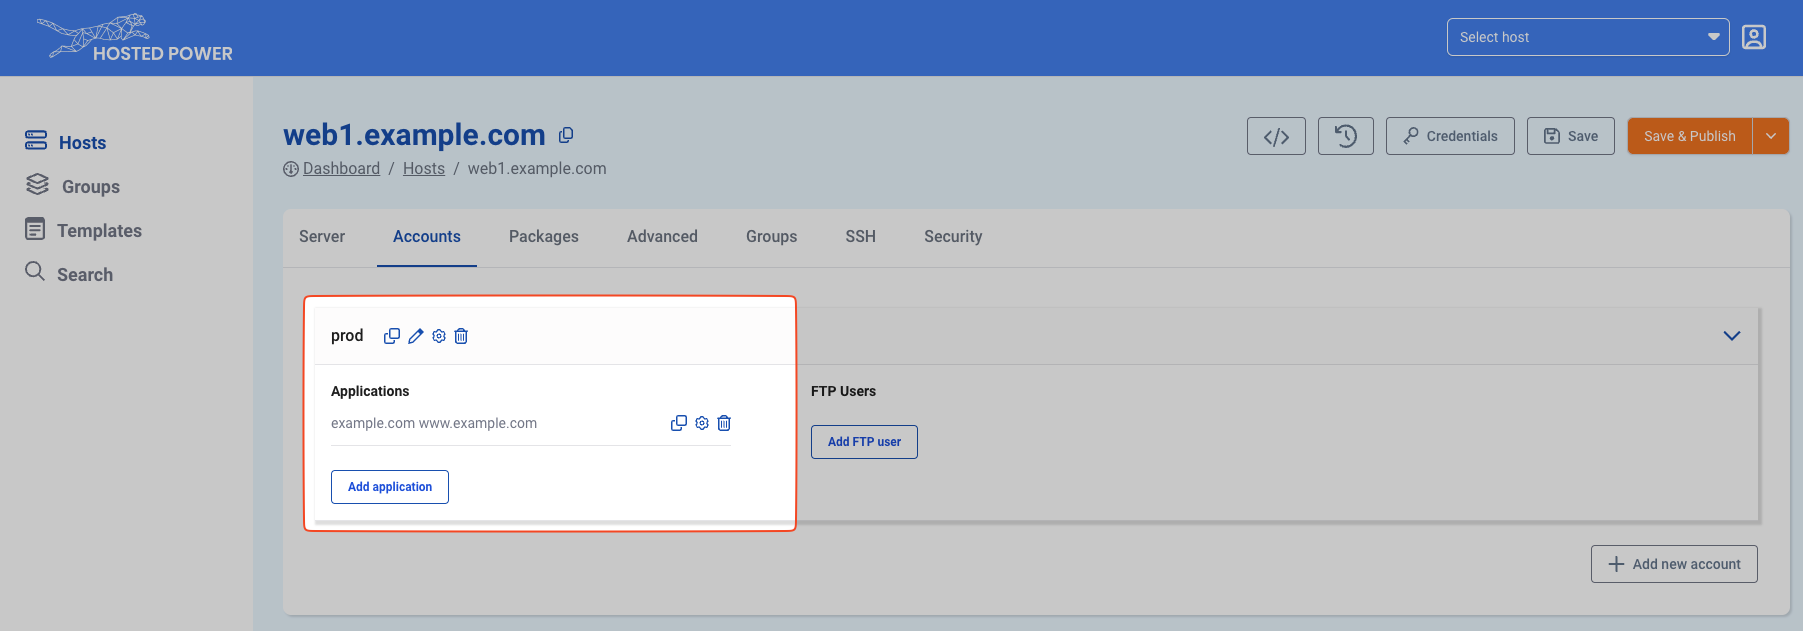
TurboStackNewApp
Now the new application is configured, click Save & Publish to deploy the configuration to the server.
(*) Let's Encrypt certificates can only be validated of the selected hostnames already have the proper DNS settings to point them to the server. If this condition is not met, the validation will fail, and publishing will throw an error! If you cannot adjust DNS, but you do need HTTPS, you can choose a self-signed certificate and change it to Let's Encrypt whenever you're ready.
(**) The app type should match the CMS or framework that will be installed on this environment, and automatically applies some application-specific configuration. Can't find your CMS of framework in this list? Contact us!
#
Creating a new application in source code mode (YAML)
Advanced
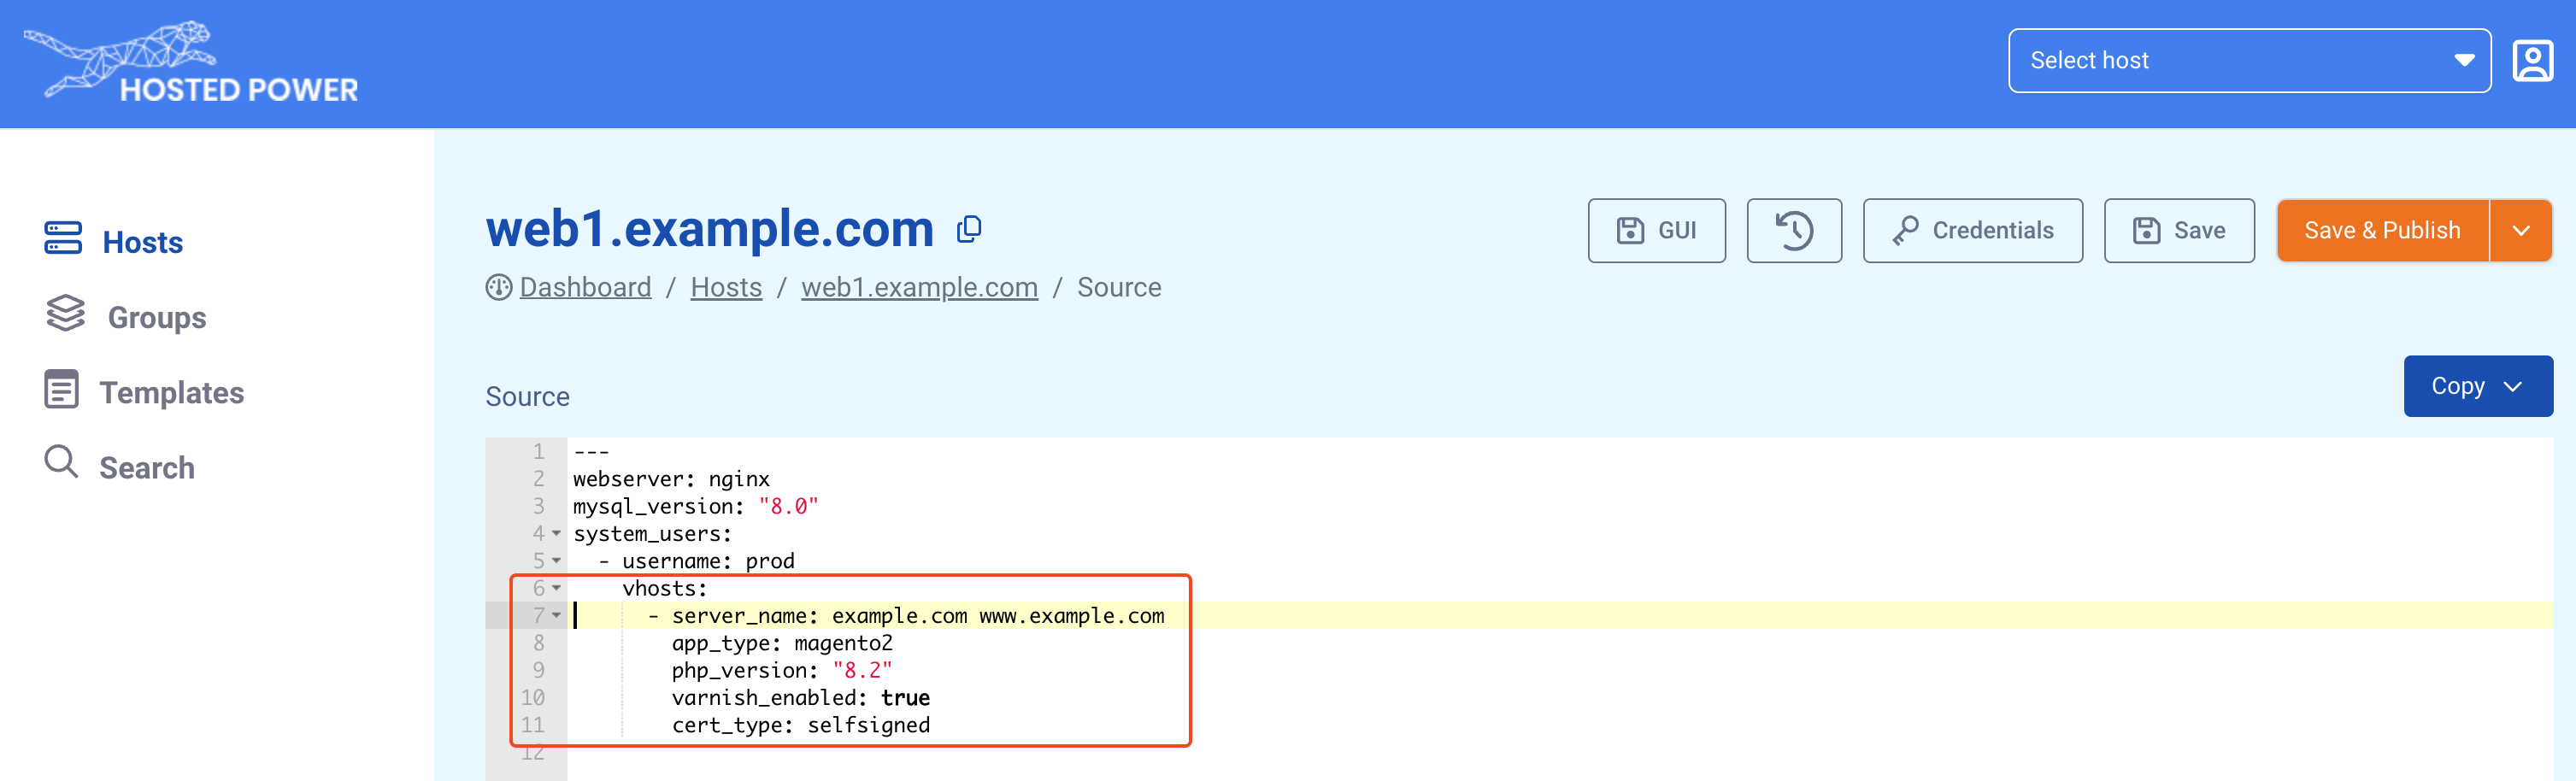
For more advanced users there also the YAML configuration. adding a new application can be done with
system_users:
  - username: prod
    vhosts:
      - server_name: example.com www.example.com
        app_type: magento2
        php_version: "8.2"
        varnish_enabled: true
        cert_type: self-signed
a system_user (e.g. prod) is needed before an application can be deployed
#
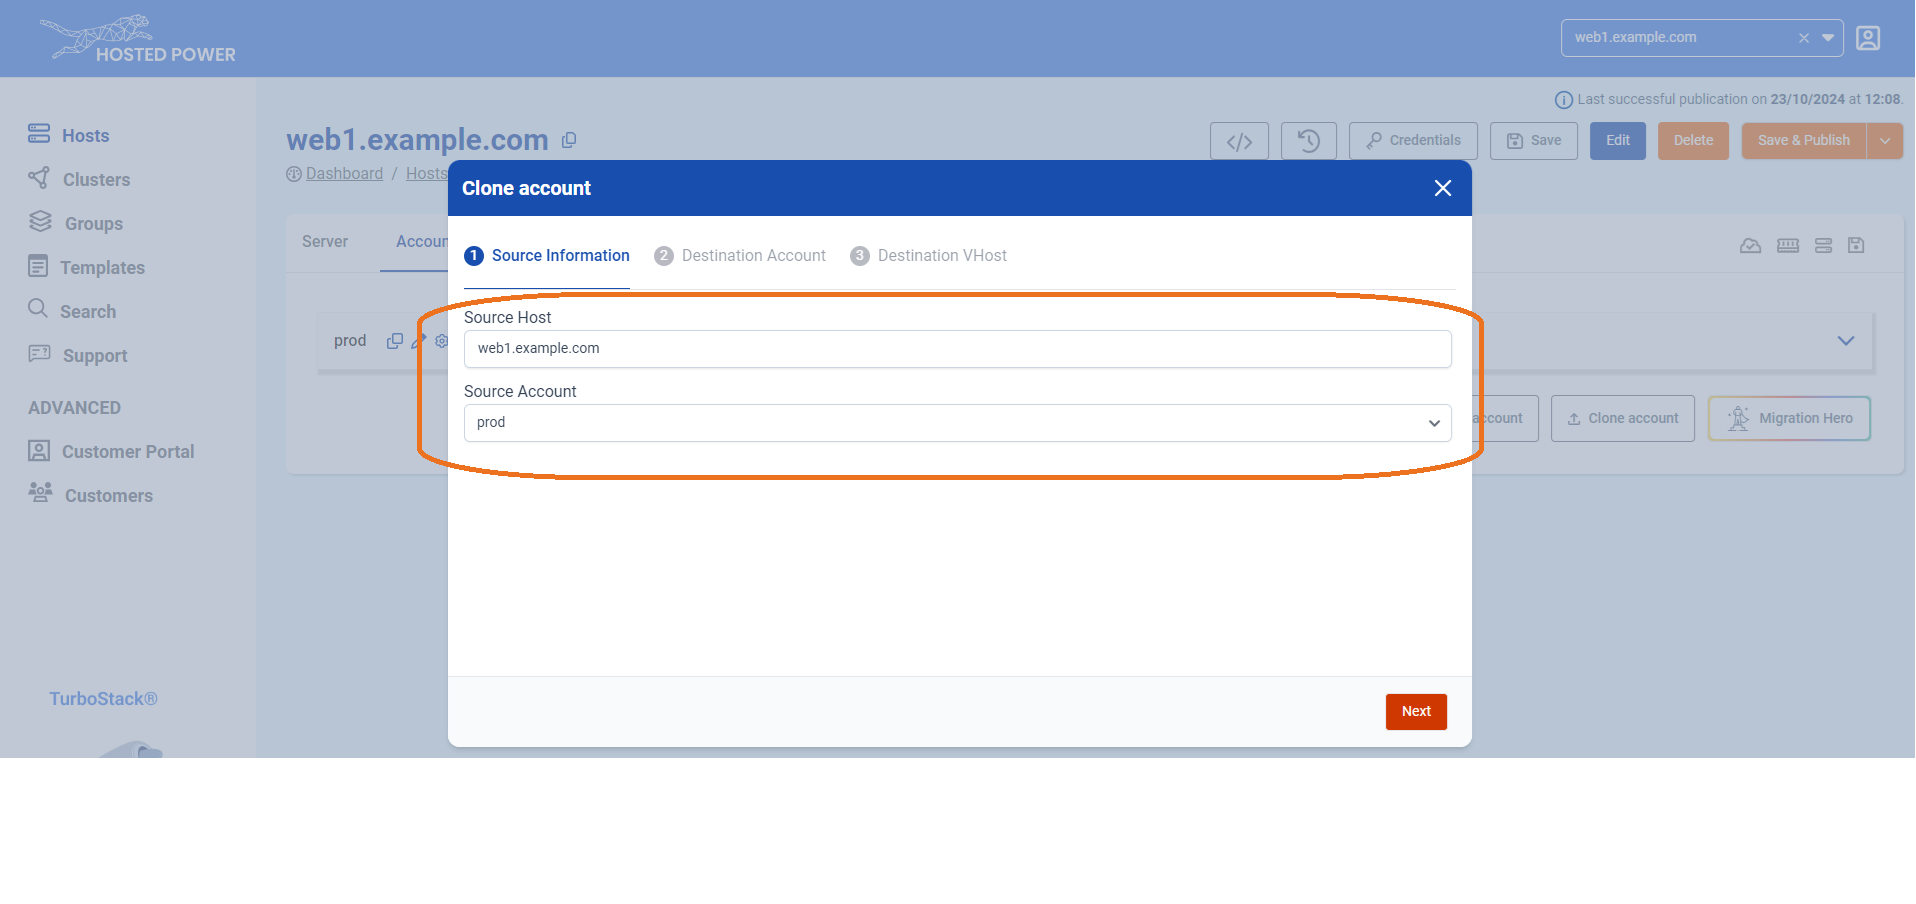
Cloning an account
To make a clone of an existing application, we provide the Clone Account feature. This function replicates the entire configuration and copies the files and database, enabling a quick and efficient setup with minimal effort.
This feature is extremely useful to quickly copy your production environment to a staging environment or vice versa!
Here’s how to do it:
- Navigate to the
Accountstab in the TurboStack App under your host.
TurboStackNewUser - Click
Clone Account.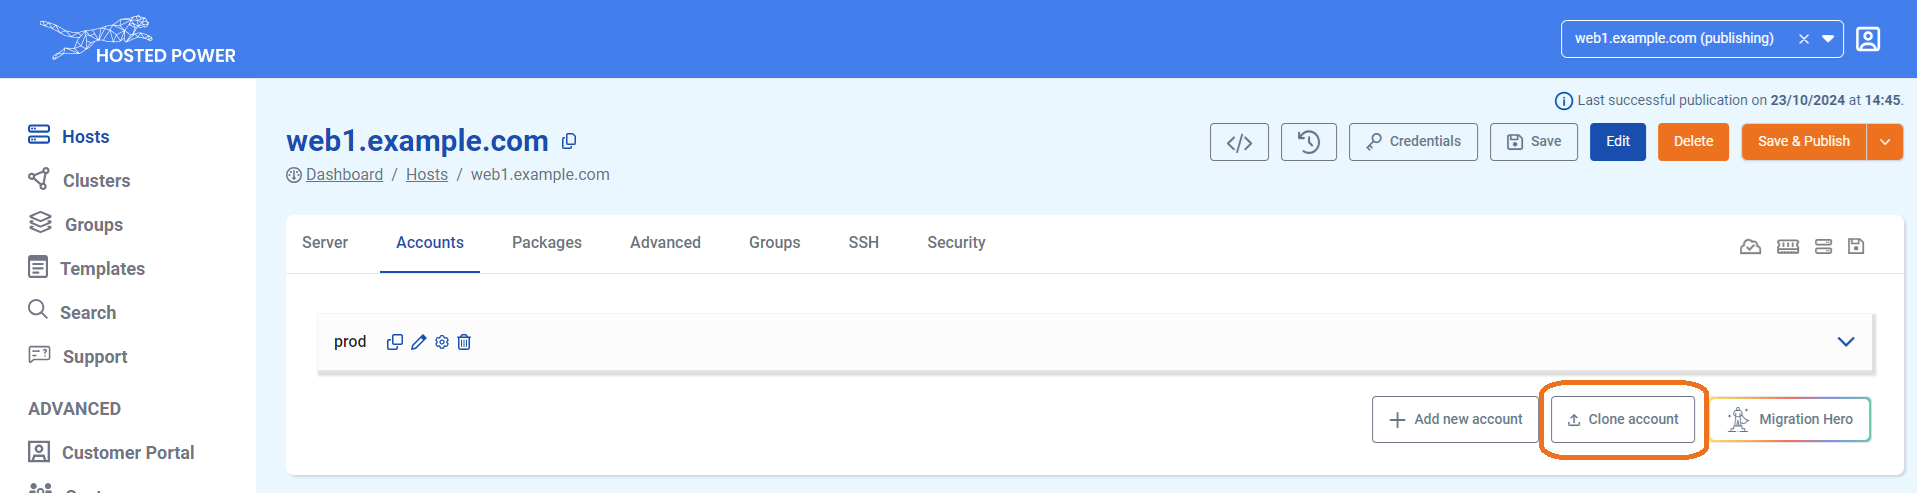
TurboStackNewUser - In the next step, select the source host. This can be either the current server or another server you manage.
TurboStackNewUser - Choose the account you want to clone, then click
Next.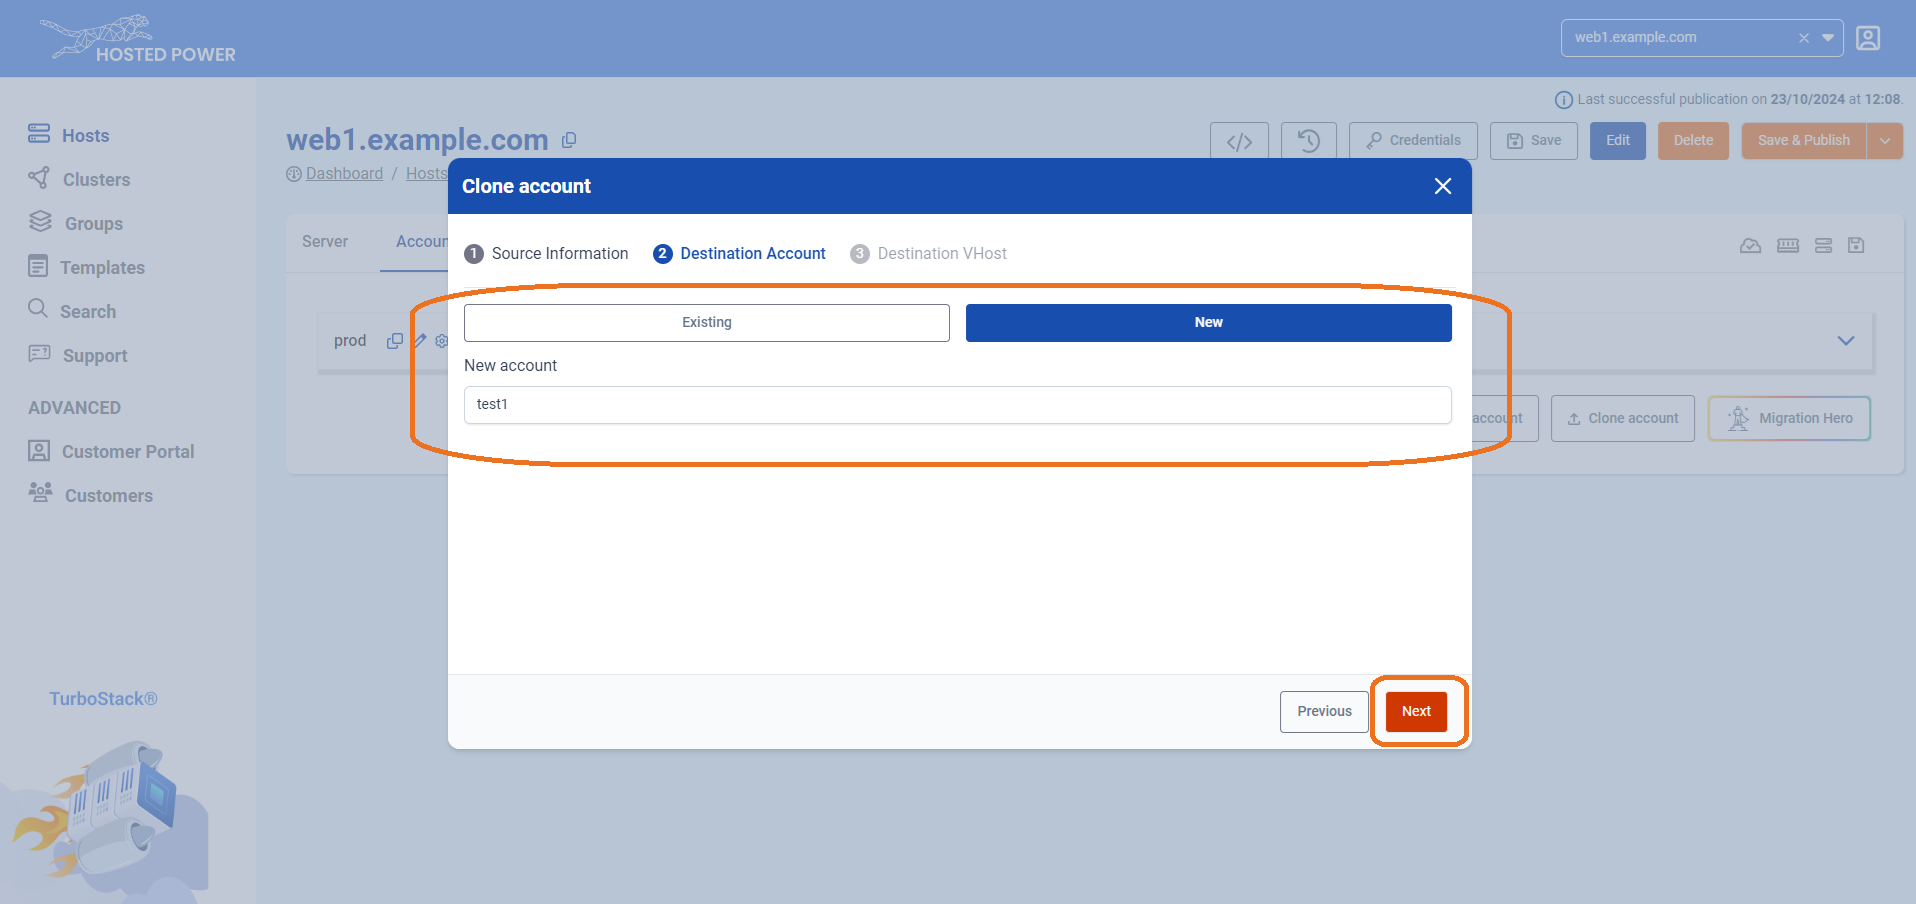
TurboStackNewUser - You'll be prompted to decide whether to copy the source account to an existing account or create a new account. Make your selection and click
Next.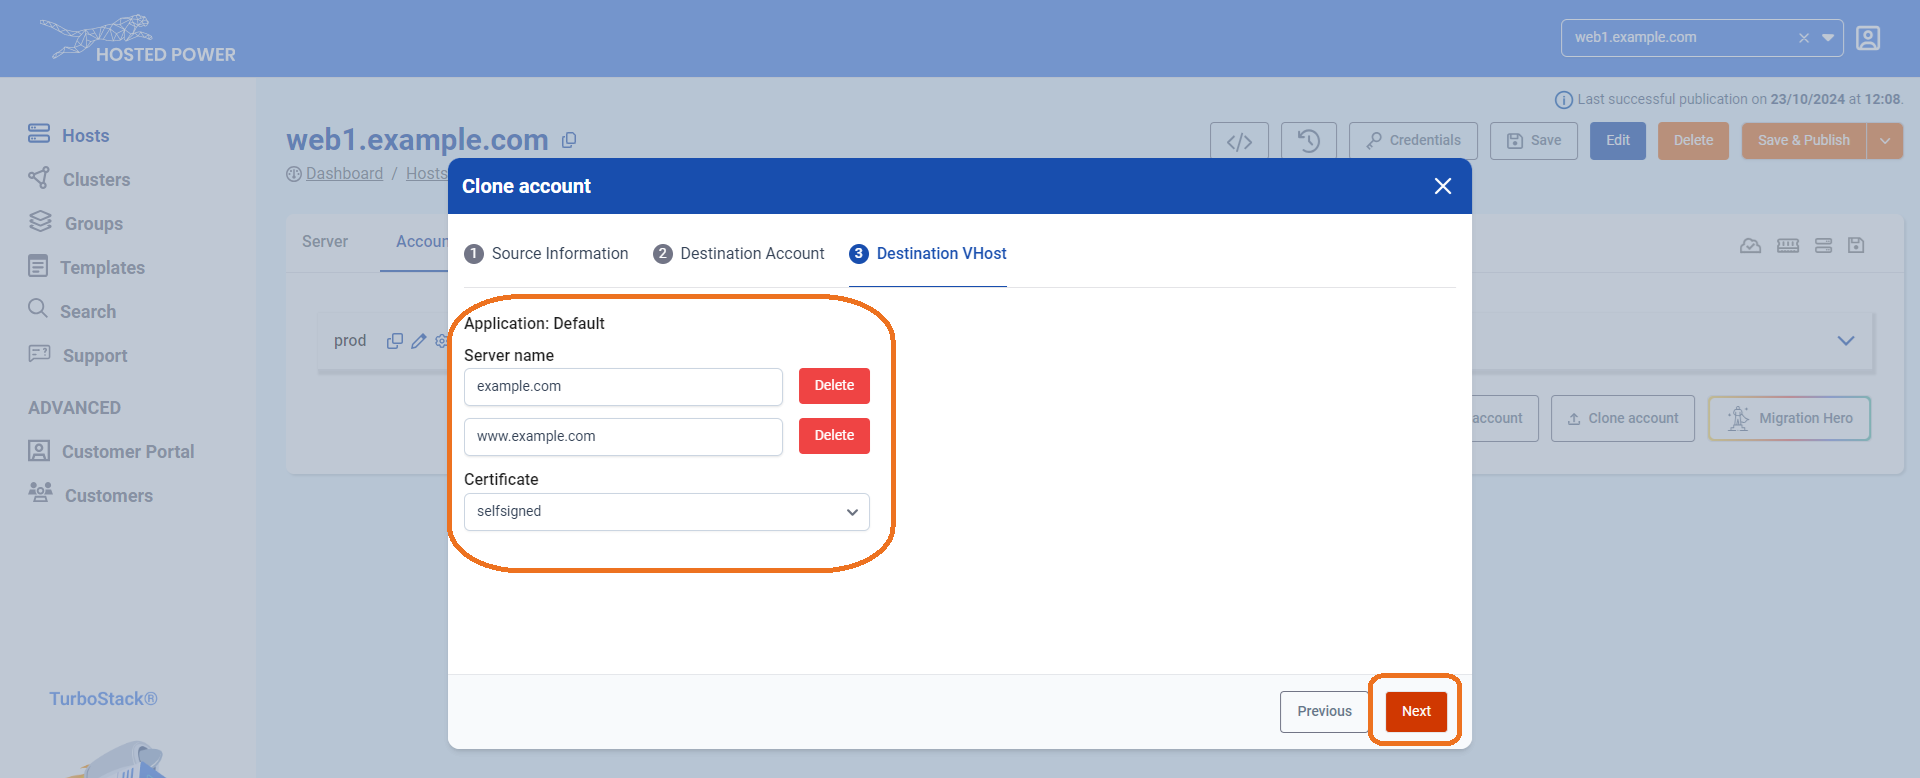
TurboStackNewUser - Select the hostname(s) you'd like to associate with the account and choose the type of certificate you want to activate. Click
Nextto finalize.
TurboStackNewUser
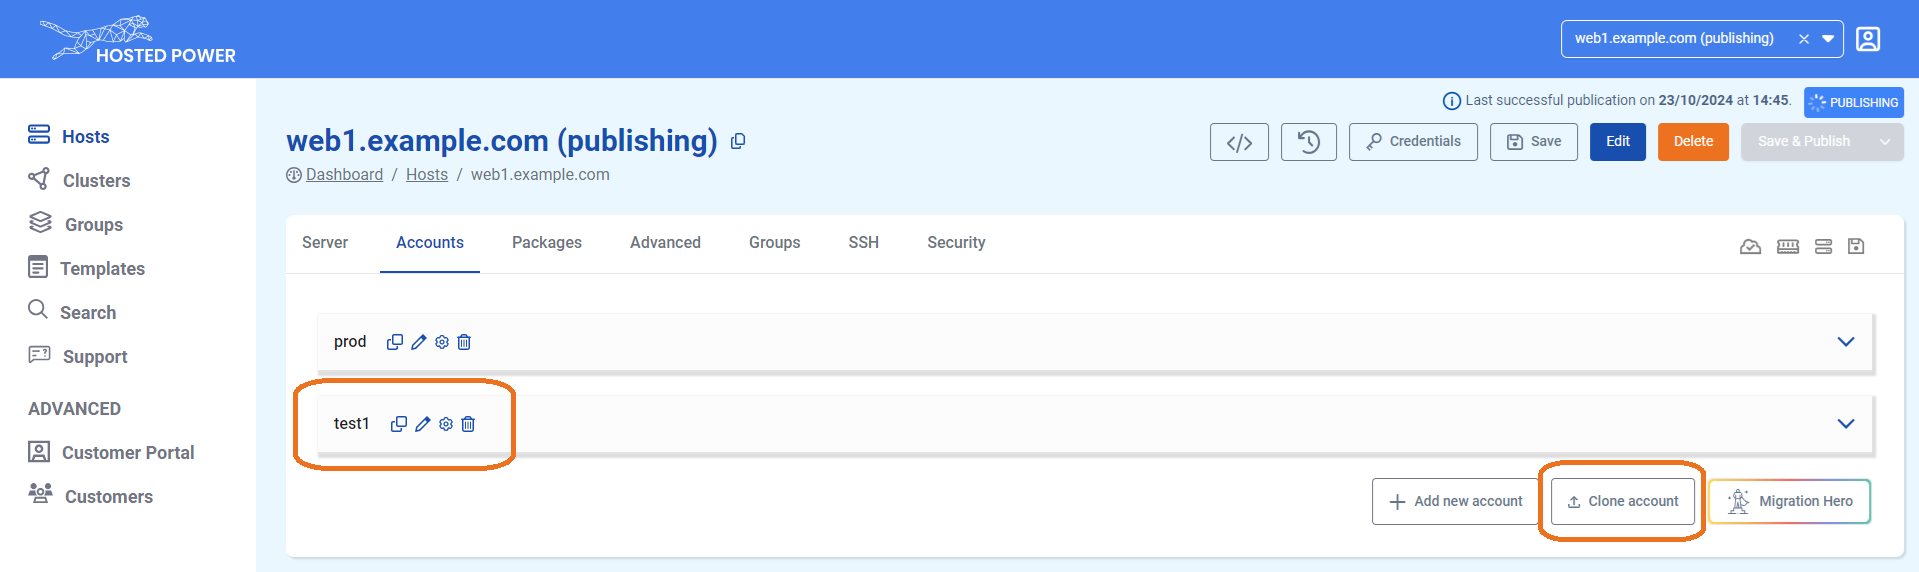
And that’s it! Your application is now cloned to a new account. Be sure to save the configuration and publish it when you're ready.