
Configure Varnish on TurboStack
Enable Varnish full-page caching for an application and, where needed, tune the cache size, custom VCL, and Varnish type at the host level.
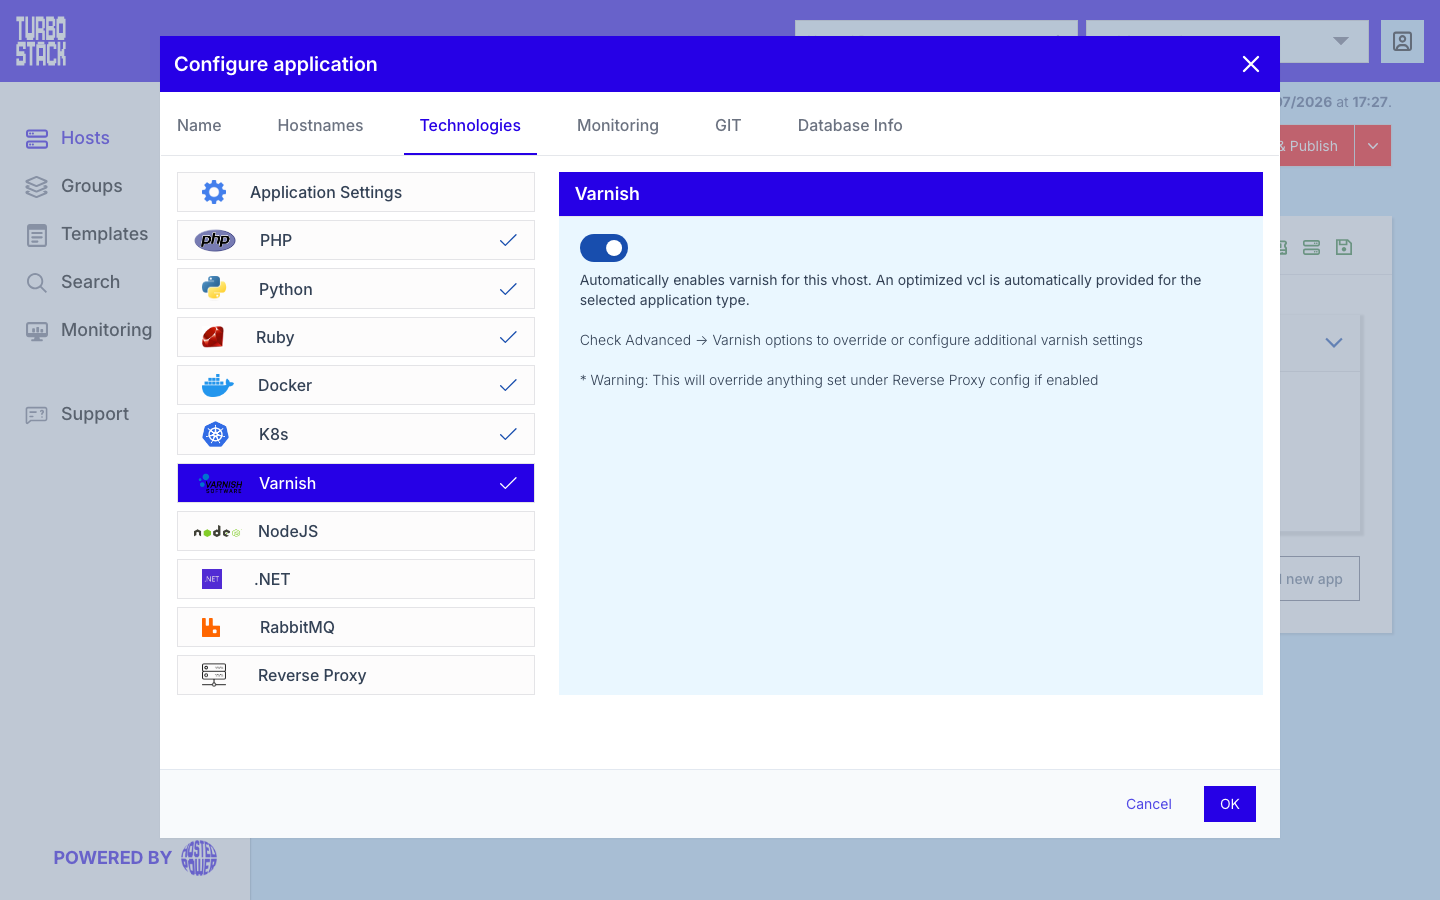
Where to configure it
Varnish is enabled per application. Open the application, go to Configure application > Technologies > Varnish, and turn it on.
Host-level tuning lives with the host. Open the host and go to the Advanced > Varnish Options tab to adjust the cache size, custom VCL, and Varnish type.
YAML configuration
Required
Optional
# Per-application application configuration
varnish_enabled: true
# Host advanced options (override only if needed):
# varnish_cache_size is auto-sized
# varnish_customvcl: |
#   # expert-only custom VCL
# varnish_type: enterprise       # needs a license token
# varnish_backend_host: 10.0.0.7 # both keys or neither
# varnish_backend_port: "8080"
Open source or Enterprise
varnish_type selects the edition, and the two are not interchangeable underneath: the
open-source build keeps the cache in memory (malloc), while Enterprise uses its own storage
engine. Enterprise needs a license token; without one the deployment stops with an error.
Warning
Switching varnish_type on a host that already runs Varnish uninstalls the current edition
before installing the other one. The cache is empty afterwards, so expect a period of slower
responses while it fills up again. Plan the switch outside peak hours.
varnish_modules installs a set of extra VMODs, and is on unless you turn it off. It applies to
the open-source edition only - Enterprise ships its own modules and ignores the key. Leave it on if
your custom VCL calls anything beyond the built-in functions.
Sending misses to another backend
By default Varnish forwards a cache miss to the application on the same host. Set
varnish_backend_host and varnish_backend_port together to point it somewhere else, for
example at an application server in a split setup. Setting only one of the two changes nothing:
both must be filled in before the custom backend is written.
Warning
varnish_customvcl is for experts only - a mistake can cache the wrong content
or break the storefront. Leave varnish_cache_size auto-sized unless you have
a specific reason to change it.
The default VCL structure
TurboStack loads a top-level default.vcl that pulls in the backend definition, the
access-control list, and any additional VCL files. It also declares the standard Varnish
subroutines - vcl_recv, vcl_backend_response and vcl_deliver - where request and
response handling happens:
vcl 4.1;
import std;

include "/etc/varnish/backend.vcl";
include "/etc/varnish/acl.vcl";

include +glob "/etc/varnish/conf.d/*.vcl";

sub vcl_recv {
    # Happens before we check if we have this in cache already.
    #
    # Typically you clean up the request here, removing cookies you don't need,
    # rewriting the request, etc.
}

sub vcl_backend_response {
    # Happens after we have read the response headers from the backend.
    #
    # Here you clean the response headers, removing silly Set-Cookie headers
    # and other mistakes your backend does.
}

sub vcl_deliver {
    # Happens when we have all the pieces we need, and are about to send the
    # response to the client.
    #
    # You can do accounting or modifying the final object here.
}
Every .vcl file under /etc/varnish/conf.d is loaded in alphabetical order, so custom
files are prefixed with an index to control their load order (lower indexes load first).
Common tasks
Related
- What is Varnish?
- Host Advanced tab
- Performance tuning
- TurboStack CLI - clear the cache with
tscli varnish clear