
Configure mail on TurboStack
Outbound mail is a host-level service. You configure two things: DKIM signing for your sending domains, and an optional development mail-catcher. Both live under the host's Advanced > Mail Settings. For the background on how mail works, see What is mail on TurboStack?.
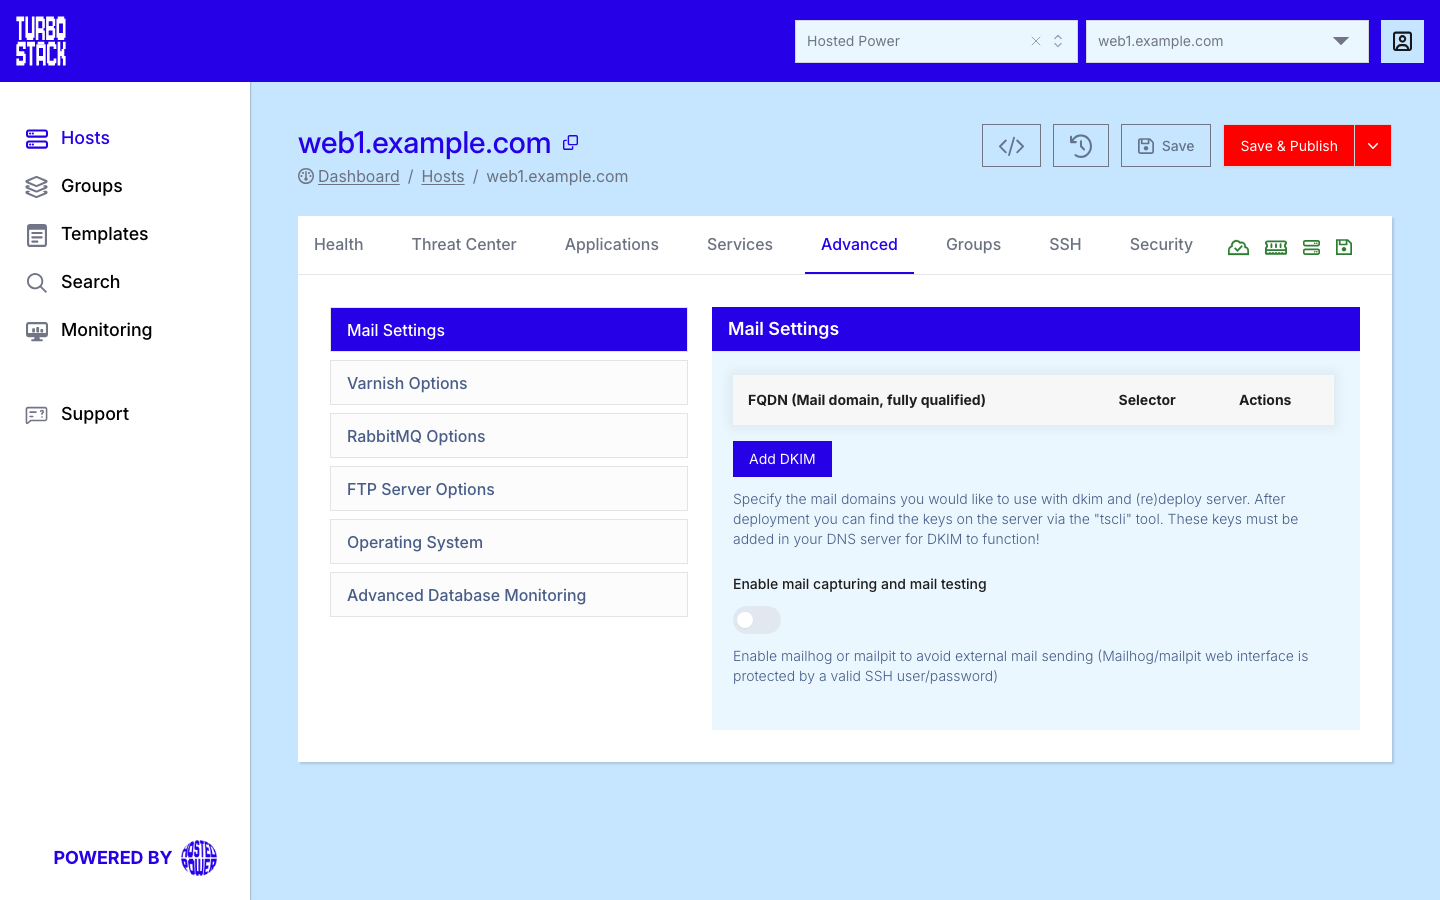
Where to configure it
Open the host, go to the Advanced tab, and select Mail Settings. Changes are written to the host's YAML and applied on the next deployment.
Note
There is no on/off switch for the local mail service - it is available on the host for your applications to send through. What you configure here is domain signing (DKIM) and the optional development mail-catcher. High-volume or marketing mail should go through an external SMTP provider, not the local service.
Set up DKIM
DomainKeys Identified Mail (DKIM) signs your outbound mail so receiving servers can confirm it genuinely came from your domain. In Mail Settings, add one DKIM entry per sending domain:
-
Enter the FQDN - the Fully Qualified Domain Name you send mail from (for example
example.com). -
Enter a selector - this becomes the subdomain part of the DKIM DNS record. If you leave it empty, TurboStack uses the default selector
cloud. -
Save the entry and deploy.
-
Connect over SSH and run
tscli dkim recordsto get the DKIM TXT record to publish. -
Add that record as a TXT record in your domain's Domain Name System (DNS) - in the Customer Center DNS management if Hosted Power manages your DNS, otherwise at your DNS provider.
-
Back on the server, run
tscli dkim validateto confirm the record was created correctly.
You can add multiple DKIM entries if you send from more than one domain. For Sender Policy Framework (SPF) and Domain-based Message Authentication, Reporting and Conformance (DMARC), which are DNS-only and not set here, see Mail deliverability.
Development mail-catcher
A mail-catcher captures outbound mail so you can inspect it in a web interface instead of delivering it - useful while building or testing an application. Enable it under Mail Settings with the Enable mail capturing and mail testing option, then choose which tool to run:
- Mailpit - the recommended catcher.
- Mailhog - the older catcher; no longer maintained.
Once enabled, PHP mail is intercepted automatically (via php.ini) by default, so mail your
application sends is captured without any code change. You can turn off auto-interception if you only
want the catcher available for applications that target it directly.
Warning
A mail-catcher intercepts mail instead of sending it. Never enable one on a production host, or real mail (password resets, order confirmations) silently disappears. This is the most common reason production mail "stops sending" - see Mail deliverability.
YAML configuration
These are the keys the Mail Settings form writes to the host YAML.
DKIM
DKIM is configured as a dkim object with a keys list. Each entry sets the fqdn and, optionally,
the selector (defaults to cloud).
dkim:
  keys:
    - fqdn: example.com
      selector: cloud
    - fqdn: shop.example.com
      selector: cloud
Development mail-catcher
# Installs Mailpit as the mail-catcher:
mail_devtool: mailpit
# Optional - auto-interception is on by default; set it to false to turn it off:
mail_auto_intercept: false
Note
Only mail_devtool decides whether a catcher is installed. You may still see mailhog_install: true
in an existing host YAML - it is harmless, but it does not enable a catcher on its own.
Related
- What is mail on TurboStack?
- Mail deliverability - SPF, DKIM and DMARC, and blocklists.
- Email deliverability troubleshooting - mail not sending, reading the mail log and the mail queue.
- SMTP error codes - decode a
5.7.xbounce. - Email - Mail Settings on the host's Advanced tab.
- Host Advanced settings.
- Connecting your domain - where to add DNS records.